• Show Sidebar

There are 1762 products.

Active filters

  • Categories: BGA Reballing Kits, Stencils
  • Categories: Laptop Parts, Repair tool
  • Categories: Pin Holder

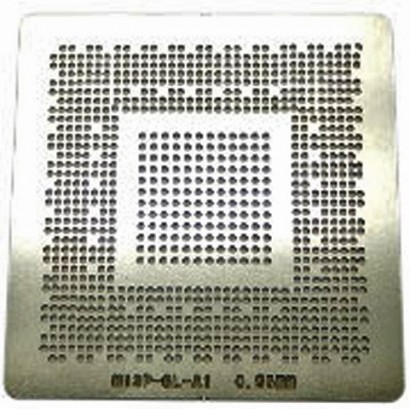
G96632C1 Stencil Template

Technical Support

BGA CHIPSET OBSERVE PRECAUTIONS FOR HANDLING

BGA Chips is MOISTURE SENSITIVE DEVICES. Devices require baking, before mounting, Here is the general bake-out process, Lay the BAG on the tray, and put it in to a baking dry cabinet. Set the temperature and time as: 125C x 24 hours or 80C x 48 hours

Pay attention to the difference between

leaded (Pb) balls and lead free (No Pb) balls.

Lead-free/No Pb BGA chips:

245C-260C(Maximun)

Leaded/Pb BGA chips:

180C-205C(Maximun)

Sufficient Stock

CH000432
€5.40

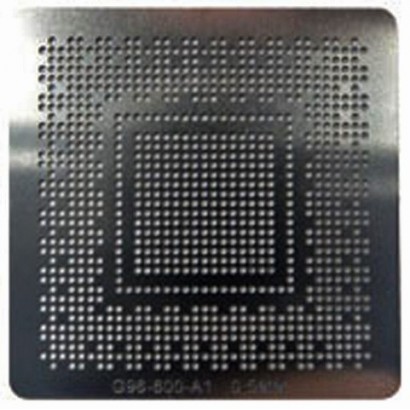
G96-632-C1 Stencil Template

CM141 LeadFree Titanium Alloy Solder Soldering Pot Desoldering Bath 900W 220V

LEAD-FREE TITANIUM ALLOY SOLDERING POT

Operation instruction

Login to Download: * Manual Download

Our Lead-free titanium alloy soldering pot passed by SGS, built-in advanced microcomputer digital control and display system, make it more safe, more steady and more accurate. Its a good tool for electronic fields.

FEATURES:

* With big power heater, only within 25minutes to reach 450? from room temperature, (Different items with a little different heating time.)

* With advanced microcomputer digital control and double displays. make it more accurate heating and fast temperature returning capability.

* The boiler made of titanium alloy, can resist high temperature, cauterization and abrasion, largely prolong the life.

* With temperature setting and locking function, will not be affected by wrong operation.

* The setting value will be saved for long time, and can not be affected by power on or off. With auto sleeping function, prolong the machines life.

* With malfunction alarm.

Working conditions:

Working voltage: AC22010V

Working temperature: 0-55?

Working temperature: < 90% no dew

WARNING:

1. The soldering pot must be put on the balanced and ovenproof working desk, prevent the glowing tin go out of the pot. And also take care of the hot tin and the hot body.

2. Do not put other pb items together with the lead-free soldering pot, prevent pb pollution. If cause the products do not eligible, then we wont take on this liability.

3. It cant be used where it will be exposed to ignitable or corrosive materials and gases.

4. If you need to move the soldering pot, please turn off the switch and move it after the pot turn cool.

5. The pot is a hot equipment, if you no need to use, please shut off the switch, and put out the plug.

6. In order to keep it safe and prolong the life, its better stop working after it has worked more than 12hours.

7. Do not heating the pot when its empty, and use the power supplier with grounding cord.

8. The pot is made of titanium which import from Japan, after it is heated by hot temperature, the color will turn to golden or blue, its natural for the material.

OPERATION:

1. Set temperature:

Press the * button, the left LED will display ?,and the right LED will display numerical value, then press the + or -button, temperature will go up or down. Press * button, the value of temperature will be saved.

2. Microcomputer adjusting itself

If the temperature has obvious discrepancy, we can adjust the inside P, I, D value, it will make the pot with accurate control, the followings are two ways of P, I, D adjusting:

A. Auto adjusting

Keep pressing + button, then press * , the left LED will display AT; the right LED will display _ _ _. Then press ? or + change the _ _ _ to AT, this time please press * for 3 times, then the pot will begin P, I, D adjusting itself. Usually it will take for about 15-30 minutes to finish this adjusting, during this adjusting the temperature will fluctuate obviously, but its no wonder. Usually, we do not recommend the users use P, I, D adjusting.

B. Adjust the value of P, I, D by manual (Do not advise users use this way, its fit for the engineers who know P, I, D very well, otherwise maybe cause bad temperature control. If really need, we just recommend the first way.) The operation as follows: Keep pressing + , then press * , the LED will display above (A) setting mode, press * again the LED will display the value of P, I, D. Manual adjusting just can be set the original value.

Remarks: The original of P, I, D value is: P=20, I=80, D=20; If the temperature in

confusion, please set the P, I, D value as original value.

3. Calibration between display and real temperature.

After the heater was replaced or the sensor was oxidated, the temperature will occur warp, the users need to calibrate the pot termly, and as the follow steps:

A. Press CAL button (If your pot without this button, please open the front cover, there is a black button on the PCB of temperature control, that is CAL), the right LED will display OFF, keep pressing ? , and press * at the same time, the left LED will display LOC, the right LED will display -3-, then press * for 3 times (just this button, do not press any other buttons), the LED will display: The first time: Left ?H, right 999; The second time: Left ?L, right 0; The third time: Left ?L, then please input the value of temperature compensation. This value is the warp between display temperature and real temperature. For example, the real temperature is more 5? higher than the display temperature, it can use ? to set -5; If the real temperature is 5? less than the display temperature, it can use + to set 5.

B. The warp temperature is the value to input, after finish setting, press * again, the set value will be saved. Then press CAL (If your pot without this button, please open the front cover, there is a black button on the PCB of temperature control, that is CAL), it will come into the ordinary display mode.

TROUBLE SHOOTING:

1. Turn on the switch but no reflection, please check the fuse, and the plug.

2. The LED display setting temperature, but the pot temperature wont go up, it means that the heater is open circuit.

3. The pot display Err when the power switch is turned on, it means that the sensor is open circuit.

CH000572
€177.78

CM141 Lead-Free Titanium Alloy Solder Soldering Pot Desoldering Bath 900W 220V

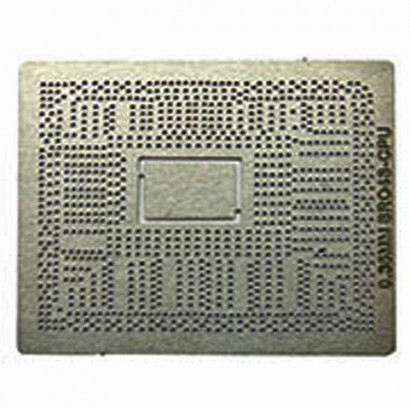
i72617M SR03T Stencil Template

Technical Support

BGA CHIPSET OBSERVE PRECAUTIONS FOR HANDLING

BGA Chips is MOISTURE SENSITIVE DEVICES. Devices require baking, before mounting, Here is the general bake-out process, Lay the BAG on the tray, and put it in to a baking dry cabinet. Set the temperature and time as: 125C x 24 hours or 80C x 48 hours

Pay attention to the difference between

leaded (Pb) balls and lead free (No Pb) balls.

Lead-free/No Pb BGA chips:

245C-260C(Maximun)

Leaded/Pb BGA chips:

180C-205C(Maximun)

Sufficient Stock

CH000433
€5.40

i7-2617M SR03T Stencil Template

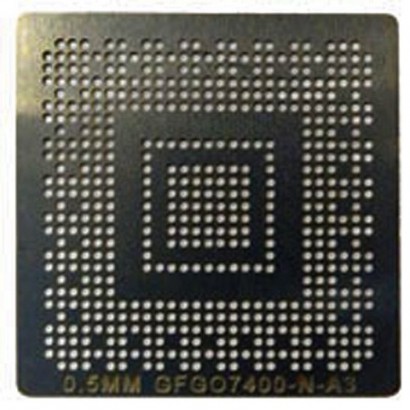
GP107300A1 Stencil Template

Technical Support

BGA CHIPSET OBSERVE PRECAUTIONS FOR HANDLING

BGA Chips is MOISTURE SENSITIVE DEVICES. Devices require baking, before mounting, Here is the general bake-out process, Lay the BAG on the tray, and put it in to a baking dry cabinet. Set the temperature and time as: 125C x 24 hours or 80C x 48 hours

Pay attention to the difference between

leaded (Pb) balls and lead free (No Pb) balls.

Lead-free/No Pb BGA chips:

245C-260C(Maximun)

Leaded/Pb BGA chips:

180C-205C(Maximun)

Sufficient Stock

CH000434
€5.40

GP107-300-A1 Stencil Template

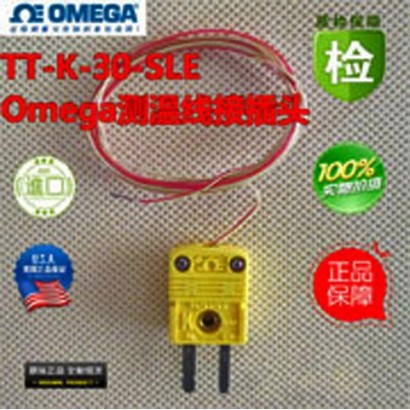
3.0m OMEGA KTYPE Thermocouple TTK30SLE

OMEGA thermocouple line

Model: temperature range: -200? ~260? (PTFE material) -200-500? (glass fiber material)

Wire diameter: 2*F0.127mm 2*0.255MM

Core material: nickel chromium / nickel silicon (K) copper / constantan (T) iron / copper nickel (J)

Color mark: red is negative / yellow is positive

The thermocouple temperature line for any K type imported and domestic use temperature recording instrument, used in the laboratory, aerospace engineering, shipbuilding, petrochemical, machinery fittings (reflow) etc.

CH000585
€7.83

3.0m OMEGA K-TYPE Thermocouple TT-K-30-SLE

G98645U2 Stencil Template

Technical Support

BGA CHIPSET OBSERVE PRECAUTIONS FOR HANDLING

BGA Chips is MOISTURE SENSITIVE DEVICES. Devices require baking, before mounting, Here is the general bake-out process, Lay the BAG on the tray, and put it in to a baking dry cabinet. Set the temperature and time as: 125C x 24 hours or 80C x 48 hours

Pay attention to the difference between

leaded (Pb) balls and lead free (No Pb) balls.

Lead-free/No Pb BGA chips:

245C-260C(Maximun)

Leaded/Pb BGA chips:

180C-205C(Maximun)

Sufficient Stock

CH000436
€5.40

G98-645-U2 Stencil Template

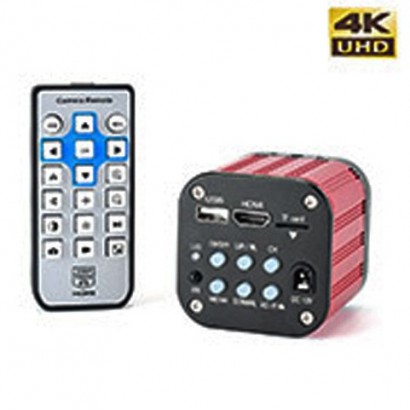
HAYEAR 4K industrial camera microscope SONY IMX377 digital microscope HDMI USB mikroskop kamera

Login to Download: Download software User Manual

This is UltraHD 4K industrial camera. Resolution is 7440 x 5580 pixels. With standard HDMI and USB interface.

It can be used for education, scientific research, laboratory, demonstration, maintenance and inspection.

Feature:

Model: HY-5099

Effective Pixels: SONY IMX CMOS 1/2.3 4K SENSOR

Resolution: 4K/2K/1080P 1080P(USB)

Sensor Size: 1/2.3inch

Pixel Size: 1.55 1.55m

Image Resolution: 4608 X 3456 (16MP)

Image Format: JPEG

Lens Type: C / CS

Frame Fate: 3840 x 2160@30FPS(4K); 1080P 120@FPS; 720P 240@FPS

Output: HDMI/USB

Storage: TF Card, Max 128G

PC Support: Windows XP/7/8/10 , PC Software with Measuring Function

Image Scaling: 8-Fold zoom

Image Measurement: Support HAYEAR Measurement Software

Support Language: English/ French/ Spanish/ Portugues/ Deutsch/ Italiano/ Chinese/ Russian/ Japanese

Camera Size: 636258 mm

Package Size: 16108 cm

Package weight: 0.5Kg

Package list:

1 x 4K Microscope Camera

1 x Power supply

1 x HDMI cable

1 x USB cable

1 x Software DISC

1 x Remote Control

CH000593
€197.67

HAYEAR 4K industrial camera microscope SONY IMX377 digital microscope HDMI USB mikroskop kamera

2160772034 Stencil Template 90x90

Technical Support

BGA CHIPSET OBSERVE PRECAUTIONS FOR HANDLING

BGA Chips is MOISTURE SENSITIVE DEVICES. Devices require baking, before mounting, Here is the general bake-out process, Lay the BAG on the tray, and put it in to a baking dry cabinet. Set the temperature and time as: 125C x 24 hours or 80C x 48 hours

Pay attention to the difference between

leaded (Pb) balls and lead free (No Pb) balls.

Lead-free/No Pb BGA chips:

245C-260C(Maximun)

Leaded/Pb BGA chips:

180C-205C(Maximun)

Sufficient Stock

CH000437
€9.97

216-0772034 Stencil Template 90*90

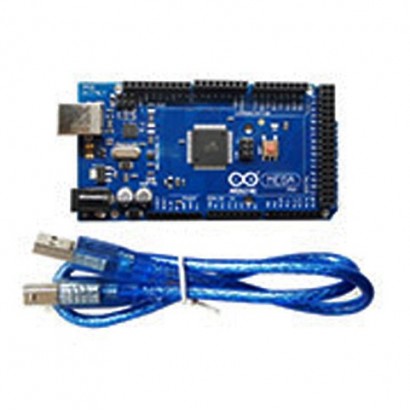
Arduino R3 Mega2560 R3 MEGA2560 REV3 ATmega256016AU Board For Arduino TFG

Mega 2560 R3 Mega2560 R3 MEGA2560 REV3 ATmega2560-16AU Board For Arduino

Description:

Manufactured By Good supplier

Microcontroller: ATmega2560.Operating Voltage 5V.Input Voltage (recommended) 7-12V.

Input Voltage (limits) 6-20V.Digital I/O Pins 54 (of which 14 provide PWM output).

Analog Input Pins 16.DC Current per I/O Pin 40 mA.

DC Current for 3.3V Pin 50 mA.Flash Memory 256 KB of which 8 KB used by bootloader.SRAM 8 KB.

EEPROM 4 KB.Clock Speed 16 MHz.

Package included:

1xWireless R3 Mega2560 R3 MEGA2560 REV3 ATmega2560-16AU Board For Arduino

CH000598
€12.00

Arduino R3 Mega2560 R3 MEGA2560 REV3 ATmega2560-16AU Board For Arduino TFG

G96632C1 Stencil Template

Technical Support

BGA CHIPSET OBSERVE PRECAUTIONS FOR HANDLING

BGA Chips is MOISTURE SENSITIVE DEVICES. Devices require baking, before mounting, Here is the general bake-out process, Lay the BAG on the tray, and put it in to a baking dry cabinet. Set the temperature and time as: 125C x 24 hours or 80C x 48 hours

Pay attention to the difference between

leaded (Pb) balls and lead free (No Pb) balls.

Lead-free/No Pb BGA chips:

245C-260C(Maximun)

Leaded/Pb BGA chips:

180C-205C(Maximun)

Sufficient Stock

CH000432
€5.40

G96-632-C1 Stencil Template

CM141 LeadFree Titanium Alloy Solder Soldering Pot Desoldering Bath 900W 220V

LEAD-FREE TITANIUM ALLOY SOLDERING POT

Operation instruction

Login to Download: * Manual Download

Our Lead-free titanium alloy soldering pot passed by SGS, built-in advanced microcomputer digital control and display system, make it more safe, more steady and more accurate. Its a good tool for electronic fields.

FEATURES:

* With big power heater, only within 25minutes to reach 450? from room temperature, (Different items with a little different heating time.)

* With advanced microcomputer digital control and double displays. make it more accurate heating and fast temperature returning capability.

* The boiler made of titanium alloy, can resist high temperature, cauterization and abrasion, largely prolong the life.

* With temperature setting and locking function, will not be affected by wrong operation.

* The setting value will be saved for long time, and can not be affected by power on or off. With auto sleeping function, prolong the machines life.

* With malfunction alarm.

Working conditions:

Working voltage: AC22010V

Working temperature: 0-55?

Working temperature: < 90% no dew

WARNING:

1. The soldering pot must be put on the balanced and ovenproof working desk, prevent the glowing tin go out of the pot. And also take care of the hot tin and the hot body.

2. Do not put other pb items together with the lead-free soldering pot, prevent pb pollution. If cause the products do not eligible, then we wont take on this liability.

3. It cant be used where it will be exposed to ignitable or corrosive materials and gases.

4. If you need to move the soldering pot, please turn off the switch and move it after the pot turn cool.

5. The pot is a hot equipment, if you no need to use, please shut off the switch, and put out the plug.

6. In order to keep it safe and prolong the life, its better stop working after it has worked more than 12hours.

7. Do not heating the pot when its empty, and use the power supplier with grounding cord.

8. The pot is made of titanium which import from Japan, after it is heated by hot temperature, the color will turn to golden or blue, its natural for the material.

OPERATION:

1. Set temperature:

Press the * button, the left LED will display ?,and the right LED will display numerical value, then press the + or -button, temperature will go up or down. Press * button, the value of temperature will be saved.

2. Microcomputer adjusting itself

If the temperature has obvious discrepancy, we can adjust the inside P, I, D value, it will make the pot with accurate control, the followings are two ways of P, I, D adjusting:

A. Auto adjusting

Keep pressing + button, then press * , the left LED will display AT; the right LED will display _ _ _. Then press ? or + change the _ _ _ to AT, this time please press * for 3 times, then the pot will begin P, I, D adjusting itself. Usually it will take for about 15-30 minutes to finish this adjusting, during this adjusting the temperature will fluctuate obviously, but its no wonder. Usually, we do not recommend the users use P, I, D adjusting.

B. Adjust the value of P, I, D by manual (Do not advise users use this way, its fit for the engineers who know P, I, D very well, otherwise maybe cause bad temperature control. If really need, we just recommend the first way.) The operation as follows: Keep pressing + , then press * , the LED will display above (A) setting mode, press * again the LED will display the value of P, I, D. Manual adjusting just can be set the original value.

Remarks: The original of P, I, D value is: P=20, I=80, D=20; If the temperature in

confusion, please set the P, I, D value as original value.

3. Calibration between display and real temperature.

After the heater was replaced or the sensor was oxidated, the temperature will occur warp, the users need to calibrate the pot termly, and as the follow steps:

A. Press CAL button (If your pot without this button, please open the front cover, there is a black button on the PCB of temperature control, that is CAL), the right LED will display OFF, keep pressing ? , and press * at the same time, the left LED will display LOC, the right LED will display -3-, then press * for 3 times (just this button, do not press any other buttons), the LED will display: The first time: Left ?H, right 999; The second time: Left ?L, right 0; The third time: Left ?L, then please input the value of temperature compensation. This value is the warp between display temperature and real temperature. For example, the real temperature is more 5? higher than the display temperature, it can use ? to set -5; If the real temperature is 5? less than the display temperature, it can use + to set 5.

B. The warp temperature is the value to input, after finish setting, press * again, the set value will be saved. Then press CAL (If your pot without this button, please open the front cover, there is a black button on the PCB of temperature control, that is CAL), it will come into the ordinary display mode.

TROUBLE SHOOTING:

1. Turn on the switch but no reflection, please check the fuse, and the plug.

2. The LED display setting temperature, but the pot temperature wont go up, it means that the heater is open circuit.

3. The pot display Err when the power switch is turned on, it means that the sensor is open circuit.

CH000572
€177.78

CM141 Lead-Free Titanium Alloy Solder Soldering Pot Desoldering Bath 900W 220V

i72617M SR03T Stencil Template

Technical Support

BGA CHIPSET OBSERVE PRECAUTIONS FOR HANDLING

BGA Chips is MOISTURE SENSITIVE DEVICES. Devices require baking, before mounting, Here is the general bake-out process, Lay the BAG on the tray, and put it in to a baking dry cabinet. Set the temperature and time as: 125C x 24 hours or 80C x 48 hours

Pay attention to the difference between

leaded (Pb) balls and lead free (No Pb) balls.

Lead-free/No Pb BGA chips:

245C-260C(Maximun)

Leaded/Pb BGA chips:

180C-205C(Maximun)

Sufficient Stock

CH000433
€5.40

i7-2617M SR03T Stencil Template

GP107300A1 Stencil Template

Technical Support

BGA CHIPSET OBSERVE PRECAUTIONS FOR HANDLING

BGA Chips is MOISTURE SENSITIVE DEVICES. Devices require baking, before mounting, Here is the general bake-out process, Lay the BAG on the tray, and put it in to a baking dry cabinet. Set the temperature and time as: 125C x 24 hours or 80C x 48 hours

Pay attention to the difference between

leaded (Pb) balls and lead free (No Pb) balls.

Lead-free/No Pb BGA chips:

245C-260C(Maximun)

Leaded/Pb BGA chips:

180C-205C(Maximun)

Sufficient Stock

CH000434
€5.40

GP107-300-A1 Stencil Template

3.0m OMEGA KTYPE Thermocouple TTK30SLE

OMEGA thermocouple line

Model: temperature range: -200? ~260? (PTFE material) -200-500? (glass fiber material)

Wire diameter: 2*F0.127mm 2*0.255MM

Core material: nickel chromium / nickel silicon (K) copper / constantan (T) iron / copper nickel (J)

Color mark: red is negative / yellow is positive

The thermocouple temperature line for any K type imported and domestic use temperature recording instrument, used in the laboratory, aerospace engineering, shipbuilding, petrochemical, machinery fittings (reflow) etc.

CH000585
€7.83

3.0m OMEGA K-TYPE Thermocouple TT-K-30-SLE

G98645U2 Stencil Template

Technical Support

BGA CHIPSET OBSERVE PRECAUTIONS FOR HANDLING

BGA Chips is MOISTURE SENSITIVE DEVICES. Devices require baking, before mounting, Here is the general bake-out process, Lay the BAG on the tray, and put it in to a baking dry cabinet. Set the temperature and time as: 125C x 24 hours or 80C x 48 hours

Pay attention to the difference between

leaded (Pb) balls and lead free (No Pb) balls.

Lead-free/No Pb BGA chips:

245C-260C(Maximun)

Leaded/Pb BGA chips:

180C-205C(Maximun)

Sufficient Stock

CH000436
€5.40

G98-645-U2 Stencil Template

HAYEAR 4K industrial camera microscope SONY IMX377 digital microscope HDMI USB mikroskop kamera

Login to Download: Download software User Manual

This is UltraHD 4K industrial camera. Resolution is 7440 x 5580 pixels. With standard HDMI and USB interface.

It can be used for education, scientific research, laboratory, demonstration, maintenance and inspection.

Feature:

Model: HY-5099

Effective Pixels: SONY IMX CMOS 1/2.3 4K SENSOR

Resolution: 4K/2K/1080P 1080P(USB)

Sensor Size: 1/2.3inch

Pixel Size: 1.55 1.55m

Image Resolution: 4608 X 3456 (16MP)

Image Format: JPEG

Lens Type: C / CS

Frame Fate: 3840 x 2160@30FPS(4K); 1080P 120@FPS; 720P 240@FPS

Output: HDMI/USB

Storage: TF Card, Max 128G

PC Support: Windows XP/7/8/10 , PC Software with Measuring Function

Image Scaling: 8-Fold zoom

Image Measurement: Support HAYEAR Measurement Software

Support Language: English/ French/ Spanish/ Portugues/ Deutsch/ Italiano/ Chinese/ Russian/ Japanese

Camera Size: 636258 mm

Package Size: 16108 cm

Package weight: 0.5Kg

Package list:

1 x 4K Microscope Camera

1 x Power supply

1 x HDMI cable

1 x USB cable

1 x Software DISC

1 x Remote Control

CH000593
€197.67

HAYEAR 4K industrial camera microscope SONY IMX377 digital microscope HDMI USB mikroskop kamera

2160772034 Stencil Template 90x90

Technical Support

BGA CHIPSET OBSERVE PRECAUTIONS FOR HANDLING

BGA Chips is MOISTURE SENSITIVE DEVICES. Devices require baking, before mounting, Here is the general bake-out process, Lay the BAG on the tray, and put it in to a baking dry cabinet. Set the temperature and time as: 125C x 24 hours or 80C x 48 hours

Pay attention to the difference between

leaded (Pb) balls and lead free (No Pb) balls.

Lead-free/No Pb BGA chips:

245C-260C(Maximun)

Leaded/Pb BGA chips:

180C-205C(Maximun)

Sufficient Stock

CH000437
€9.97

216-0772034 Stencil Template 90*90

Arduino R3 Mega2560 R3 MEGA2560 REV3 ATmega256016AU Board For Arduino TFG

Mega 2560 R3 Mega2560 R3 MEGA2560 REV3 ATmega2560-16AU Board For Arduino

Description:

Manufactured By Good supplier

Microcontroller: ATmega2560.Operating Voltage 5V.Input Voltage (recommended) 7-12V.

Input Voltage (limits) 6-20V.Digital I/O Pins 54 (of which 14 provide PWM output).

Analog Input Pins 16.DC Current per I/O Pin 40 mA.

DC Current for 3.3V Pin 50 mA.Flash Memory 256 KB of which 8 KB used by bootloader.SRAM 8 KB.

EEPROM 4 KB.Clock Speed 16 MHz.

Package included:

1xWireless R3 Mega2560 R3 MEGA2560 REV3 ATmega2560-16AU Board For Arduino

CH000598
€12.00

Arduino R3 Mega2560 R3 MEGA2560 REV3 ATmega2560-16AU Board For Arduino TFG